Muse accepts hosted MCP servers through the Muse Connector Platform. Submission starts with a listing form. The developer portal then asks for business, data processing, and credential details.
Before you start
Have these ready:
- Your hosted MCP endpoint and API or MCP documentation.
- A connector name, product website, and example prompts.
- A 512 × 512 PNG or SVG connector icon.
- Your work email, support contact, privacy policy, and terms of service.
- Details about authentication and any restrictions on access.
- Your legal business details and information about the personal data your connector handles, including subprocessors, retention, deletion, and international transfers.
- If your server requires authentication, integration instructions and a dedicated test account with representative data for Muse's reviewers.
Test the endpoint and the prompts you plan to include. Manufact Publishing Checks can help identify MCP issues before submission.
Before submitting, use the MCP quality checker and leaderboard to review your server's tool descriptions, schemas, and annotations. The score measures metadata and definition quality, not whether tools execute correctly or whether Muse will approve your connector. Test the endpoint and example prompts separately.
Open muse.ai/platform and click Submit a connector. If you are signed out, sign in or create an account with your work email. The form has three steps: Overview, Technical specs, and Review. The screenshots use Manufact's Image Generation connector at its production MCP endpoint. Enter your own server and company details.
Step 1: Overview
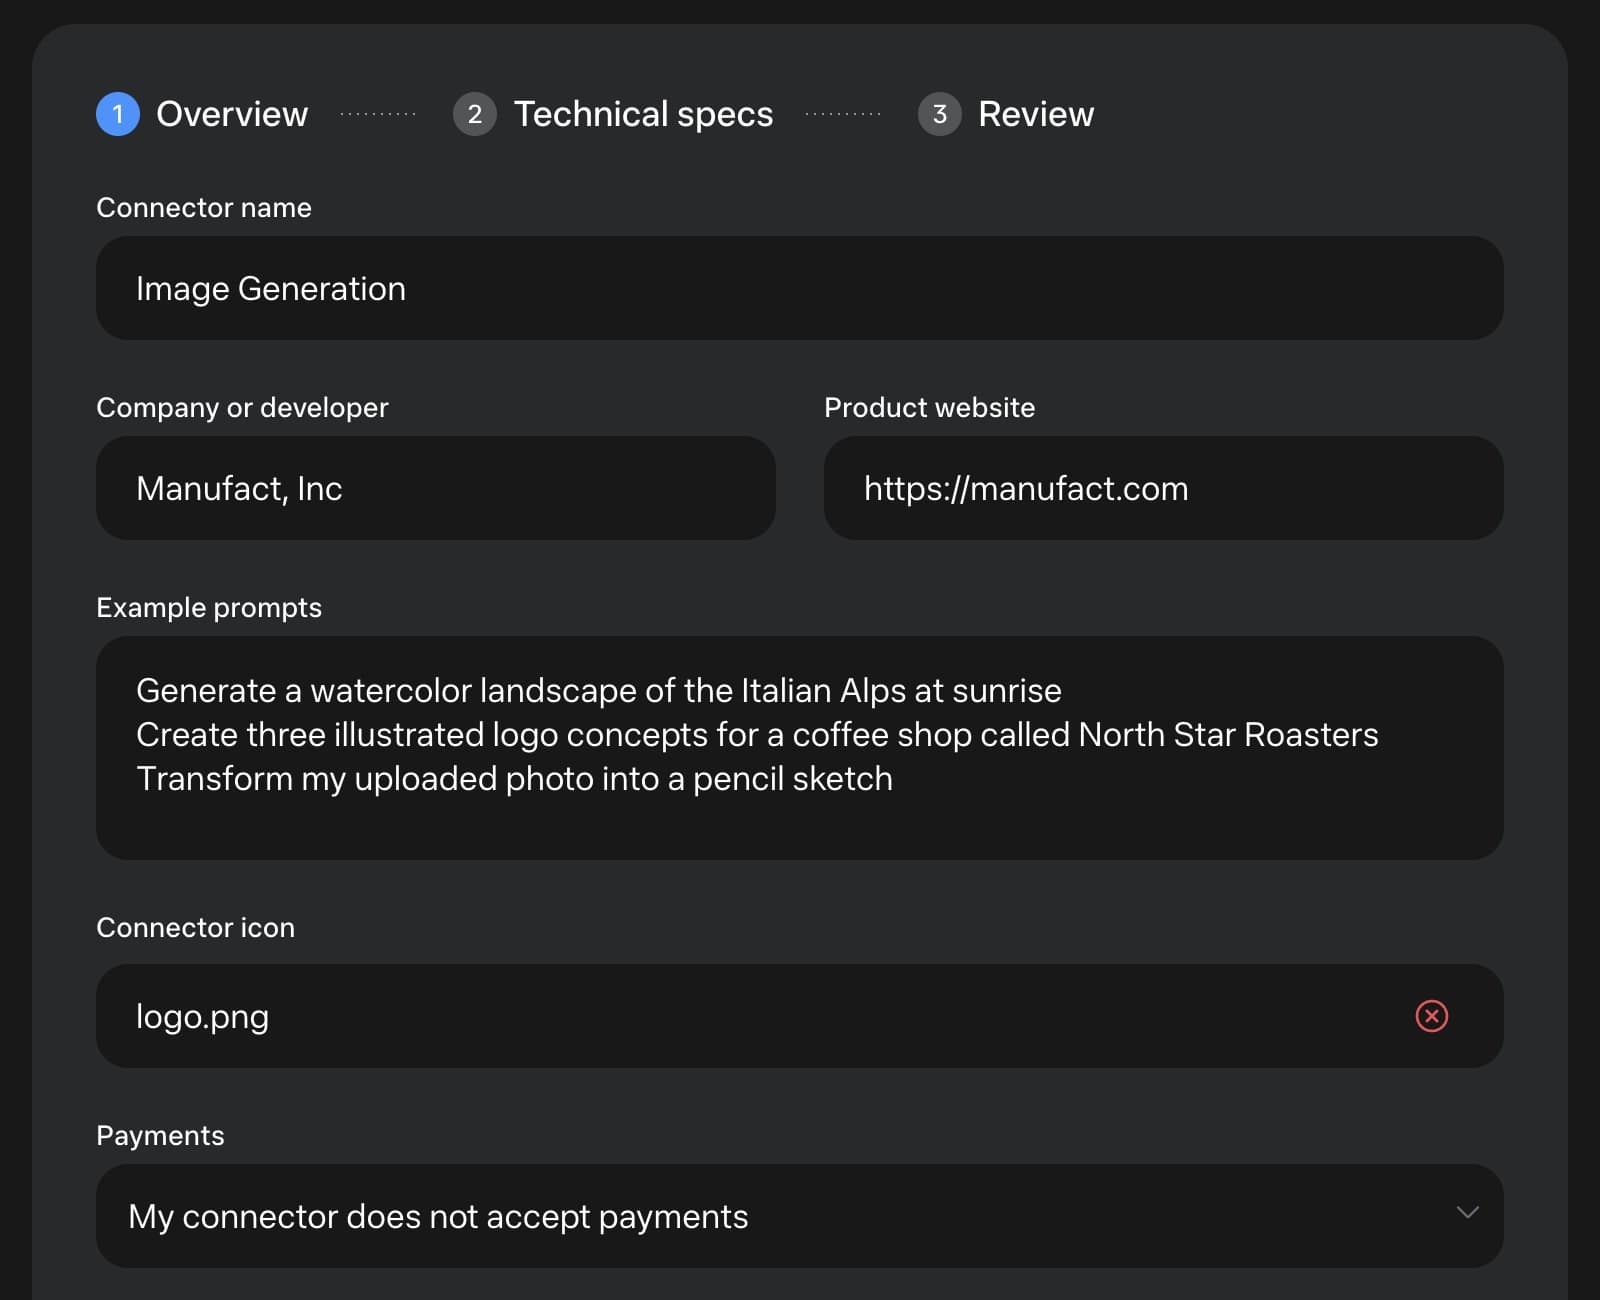
Enter the Connector name, Company or developer, and Product website. Under Example prompts, write requests your connector can handle, such as generating an image from a text prompt or transforming an uploaded image.
Upload your icon, then choose whether the connector accepts payments.
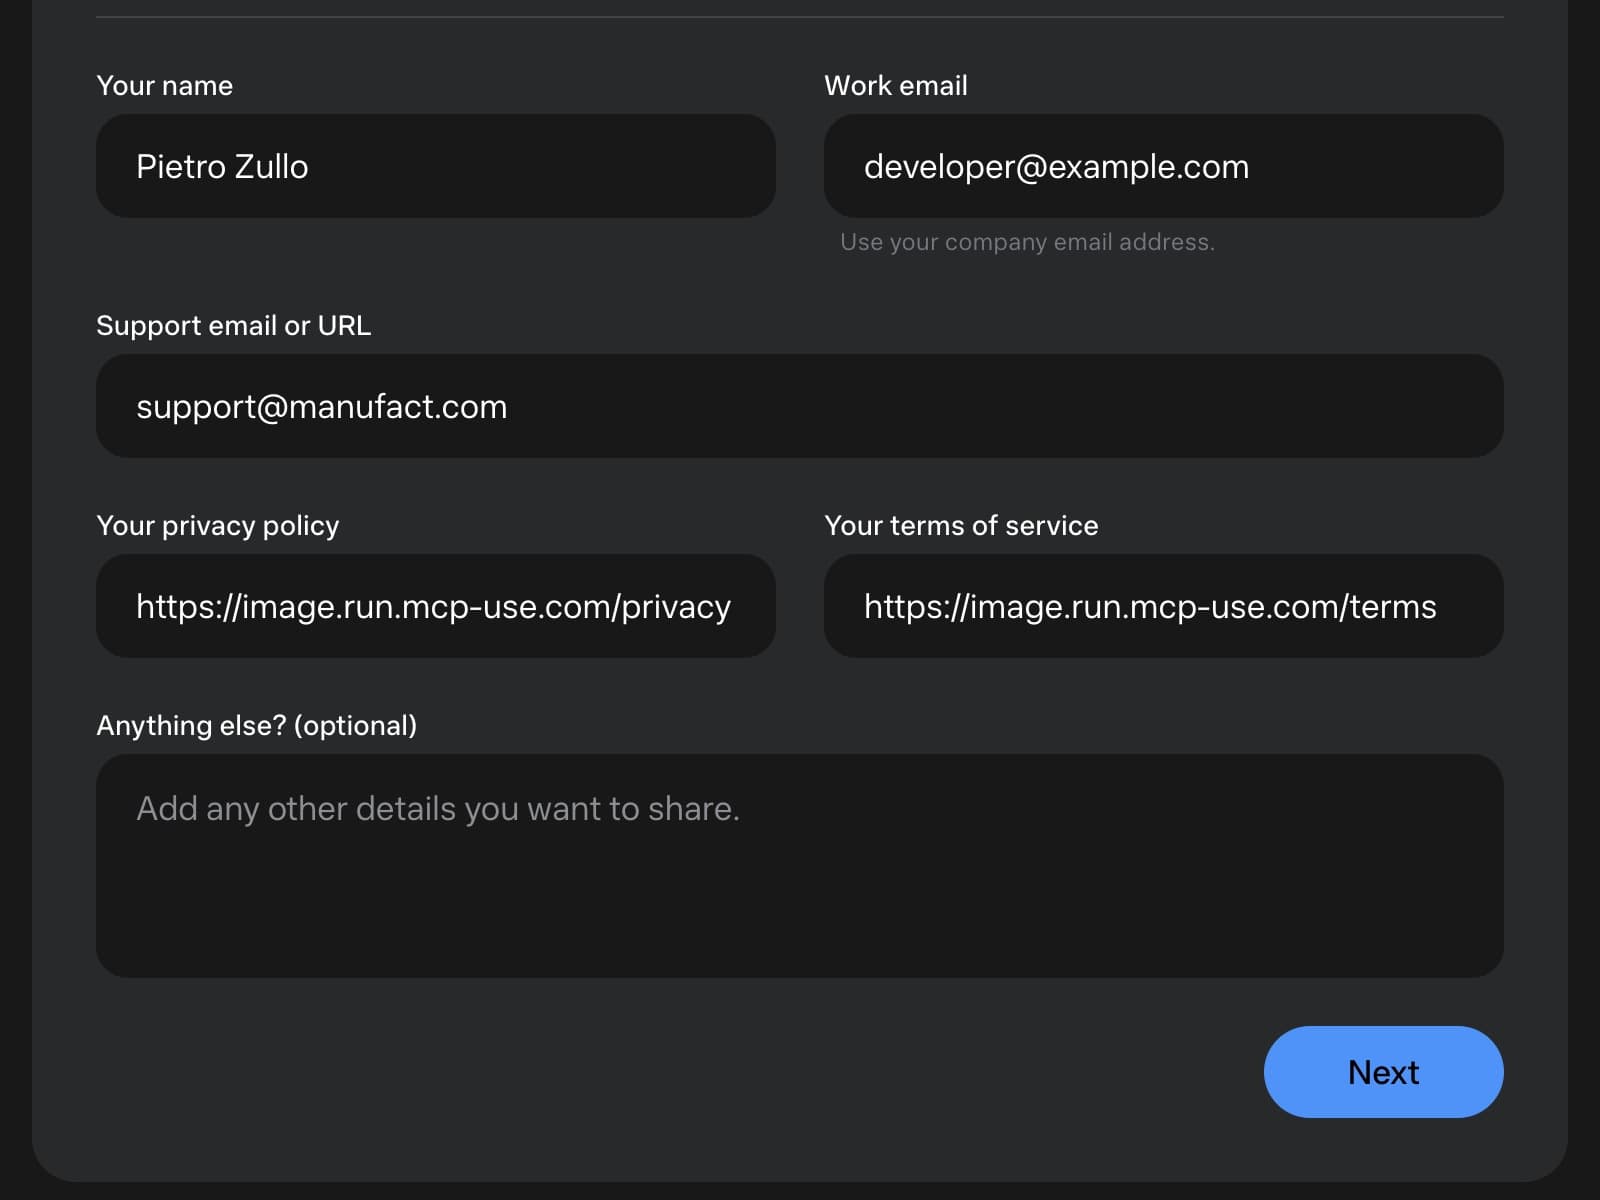
The rest of Overview asks for Your name, Work email, Support email or URL, Your privacy policy, and Your terms of service. The email field explicitly asks for a company email address. Use Anything else? for optional context, then click Next. The screenshot below uses a placeholder work email; the live submission uses the company address.
Step 2: Technical specs
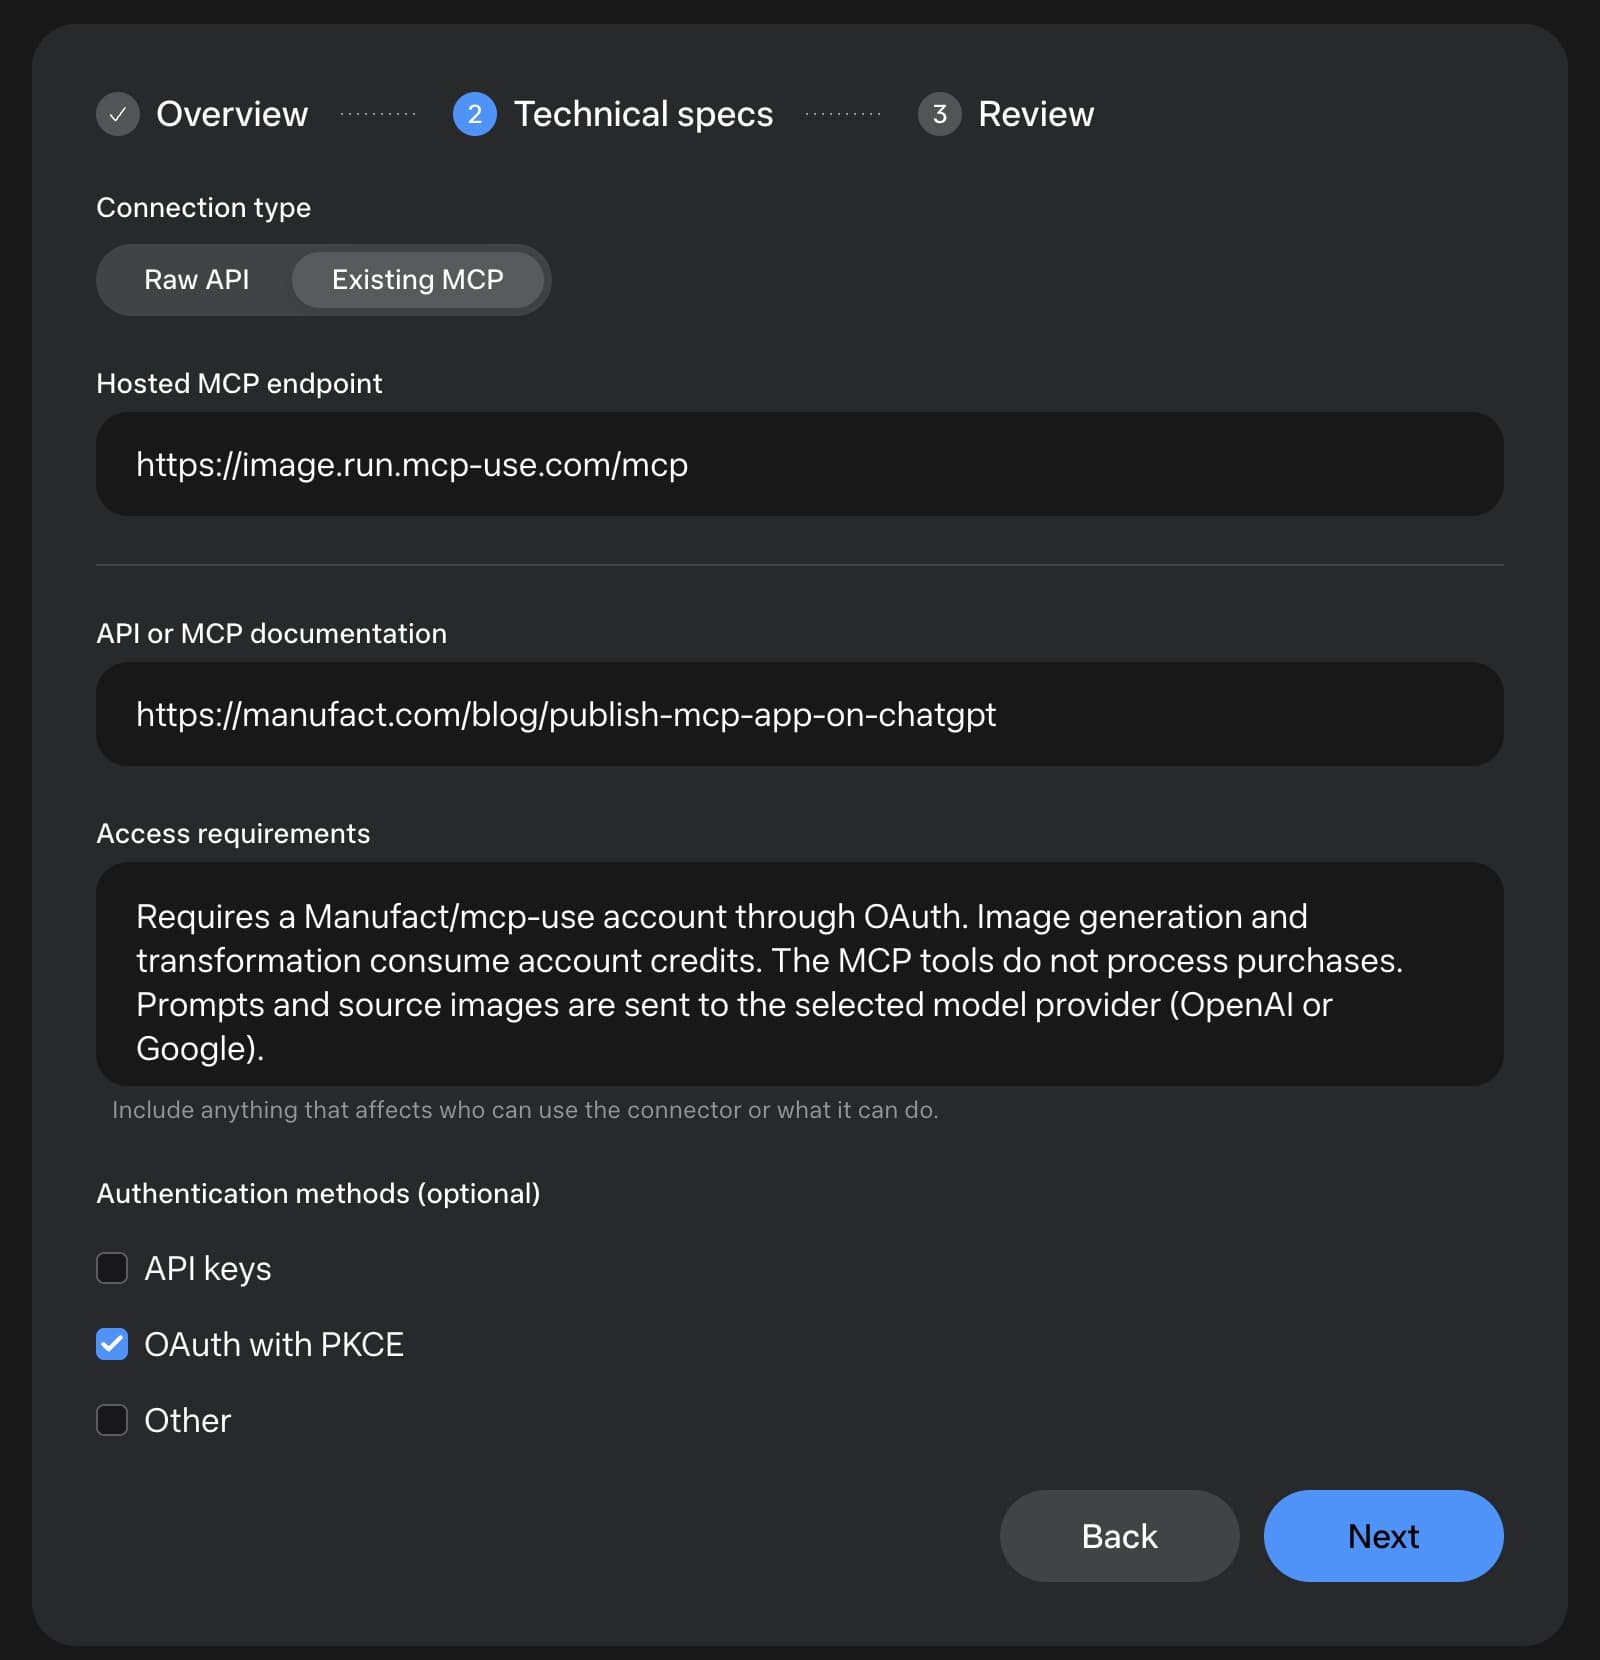
Under Connection type, select Existing MCP. The form defaults to Raw API, which has an API URL and an optional OpenAPI specification field. For an MCP server, enter your deployed URL in Hosted MCP endpoint.
Add the API or MCP documentation URL. In Access requirements, explain anything that affects who can use the connector or what it can do, such as a required account, paid plan, regional availability, or rate limits.
Authentication methods is optional and offers API keys, OAuth with PKCE, and Other. Select the methods your server supports, or leave them unchecked if authentication is not required. Image Generation uses OAuth with PKCE; its endpoint advertises the authorization server through OAuth discovery.
Click Next to inspect the completed form.
Step 3: Review
Check the listing details and technical information. Each section has an Edit button for corrections.
The final checkboxes ask you to confirm that you are authorized to submit the connector and its brand assets, acknowledge that submission does not guarantee approval, and agree to the Muse Connector Terms linked in the form. Promotion depends on usage and editorial discretion.
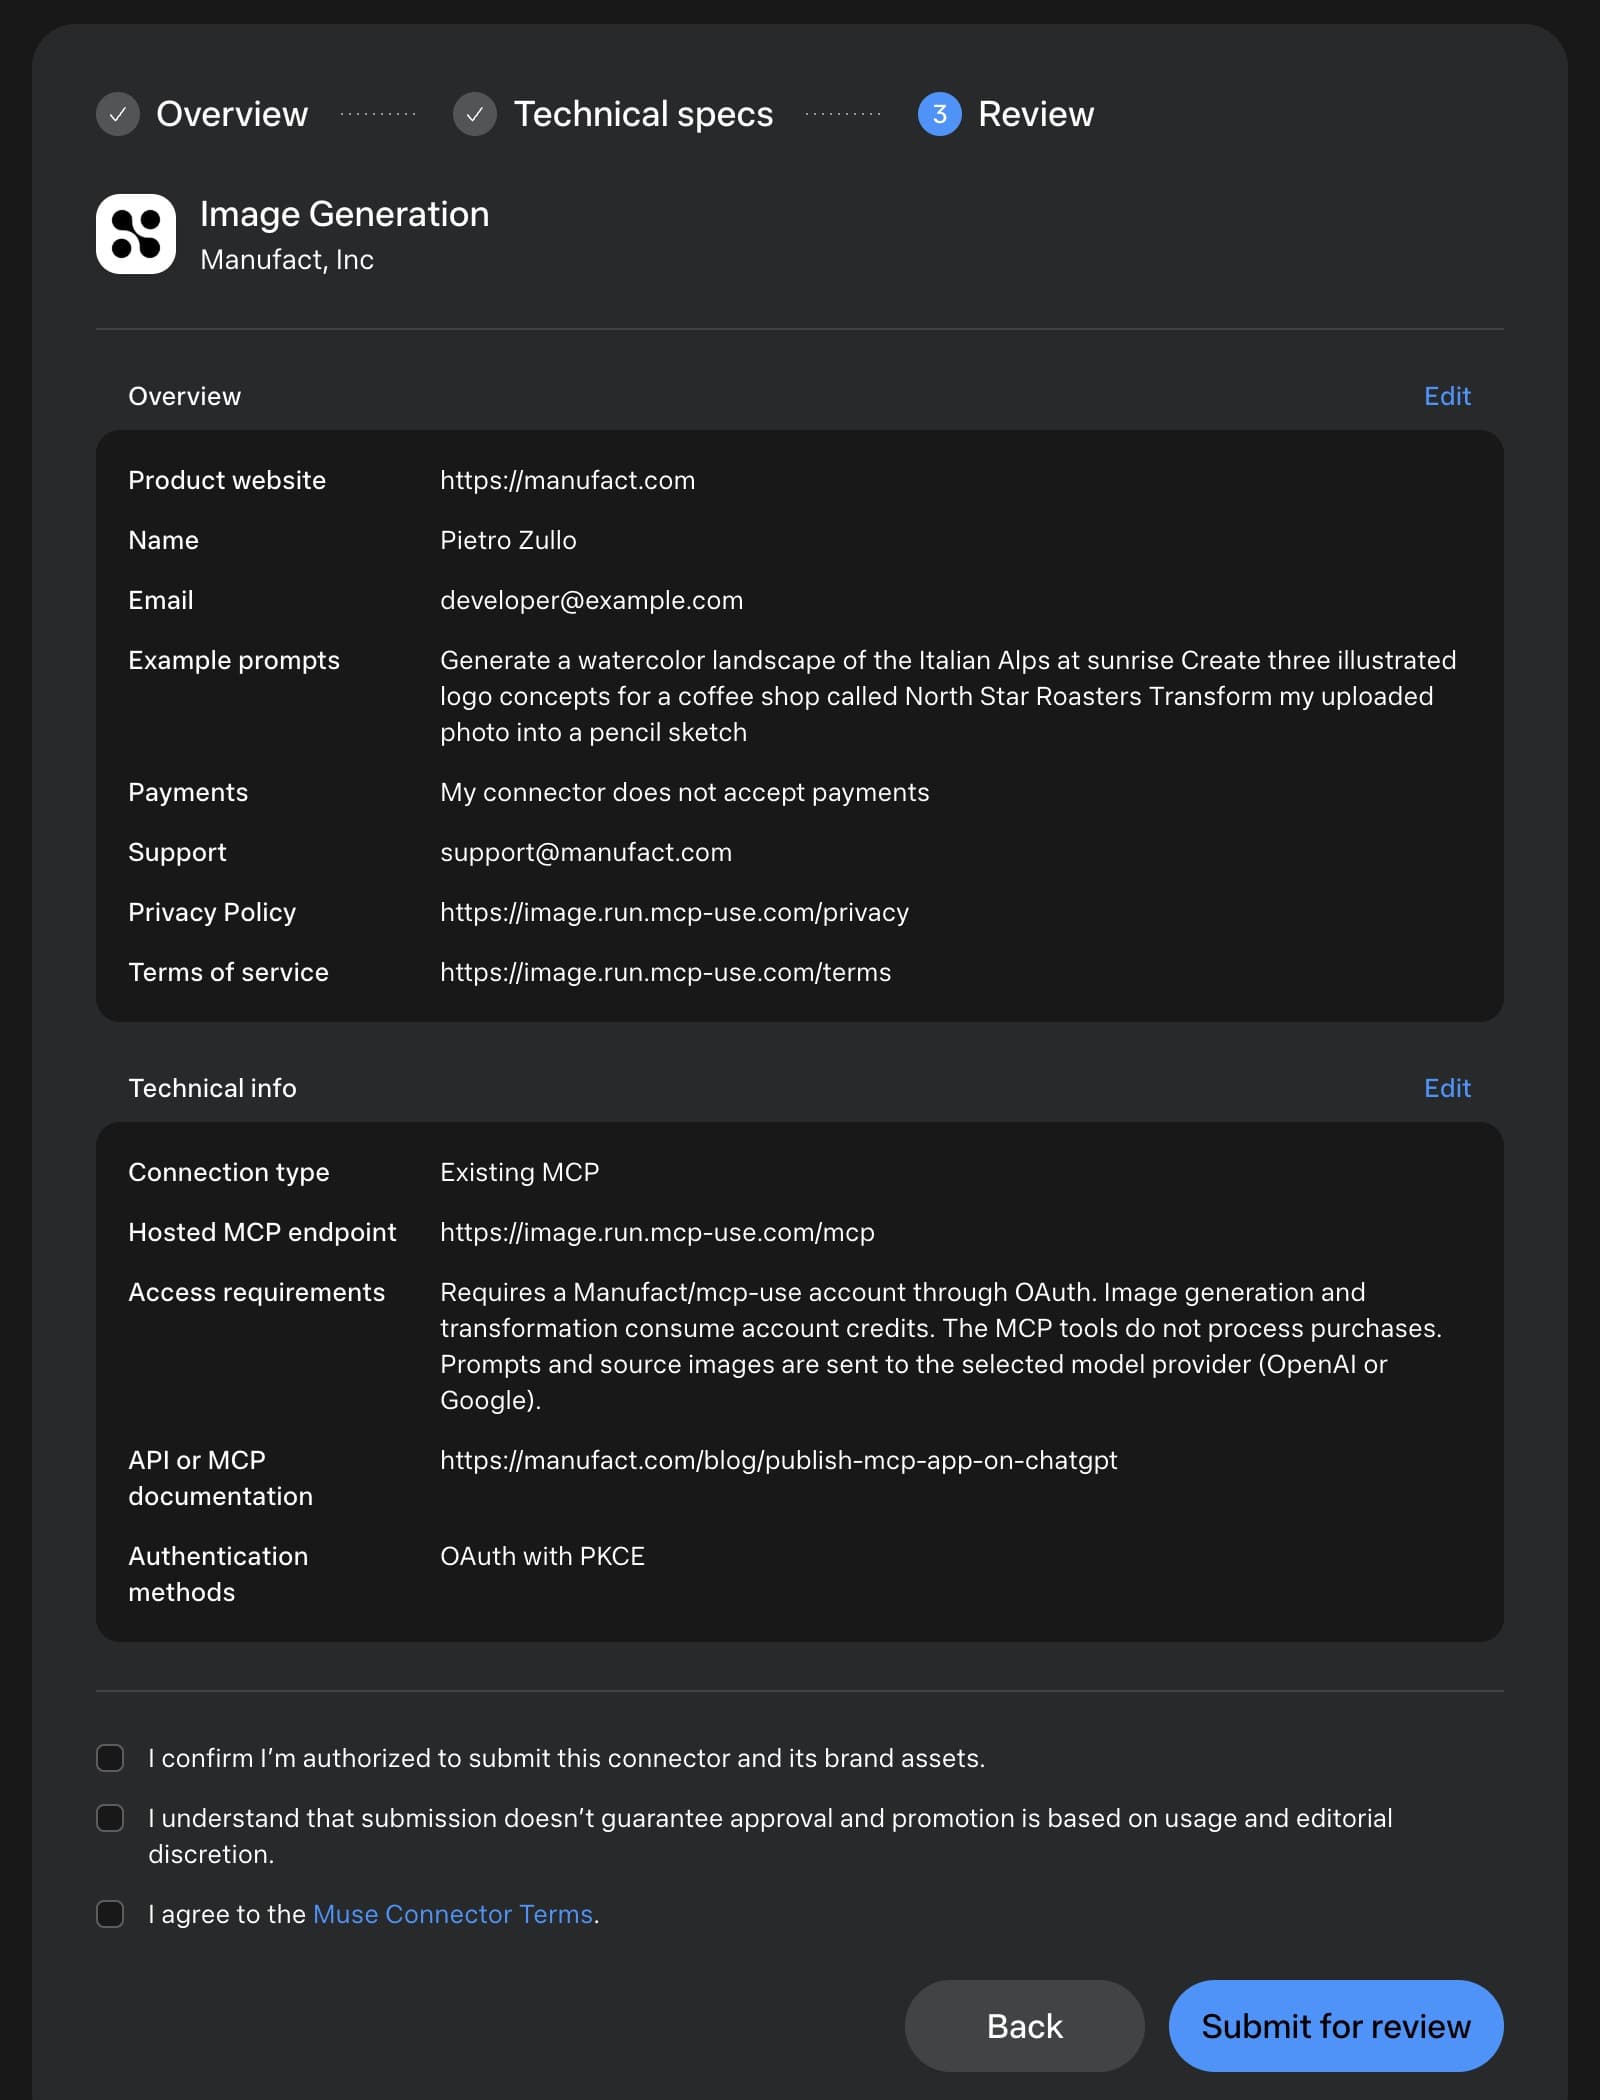
Read the terms and complete the acknowledgments, then click Submit for review. Keep the submission URL. Complete any additional intake shown in the developer portal.
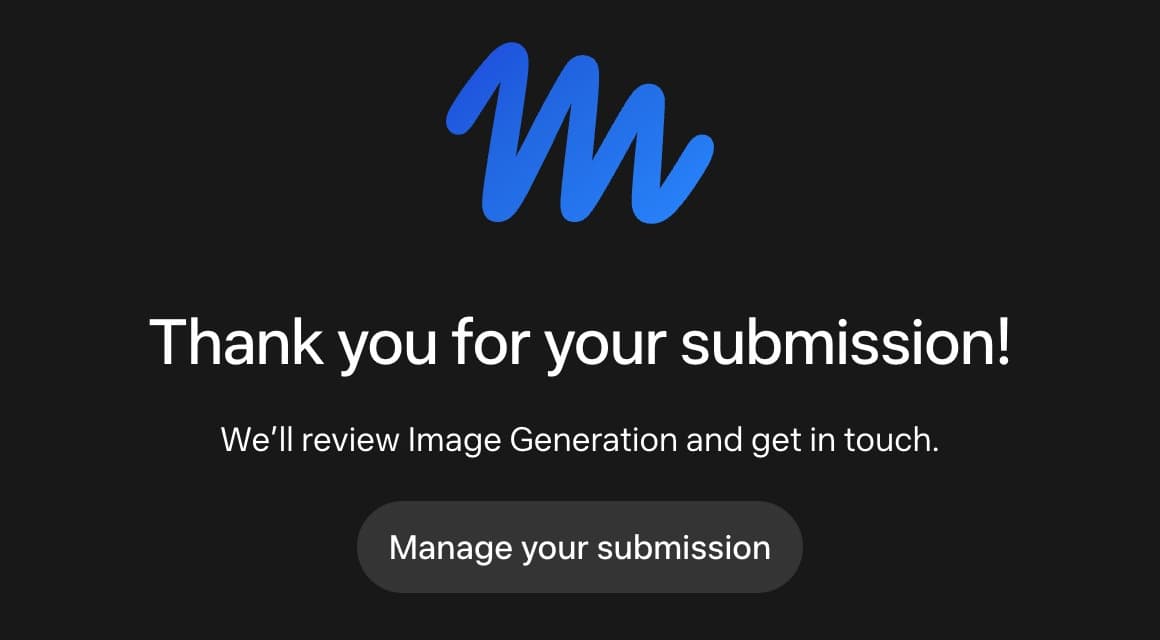
Muse confirms that the listing was submitted and links to Manage your submission. This confirmation means the listing reached Muse. The portal intake still needs attention.
Step 4: Complete the developer portal intake
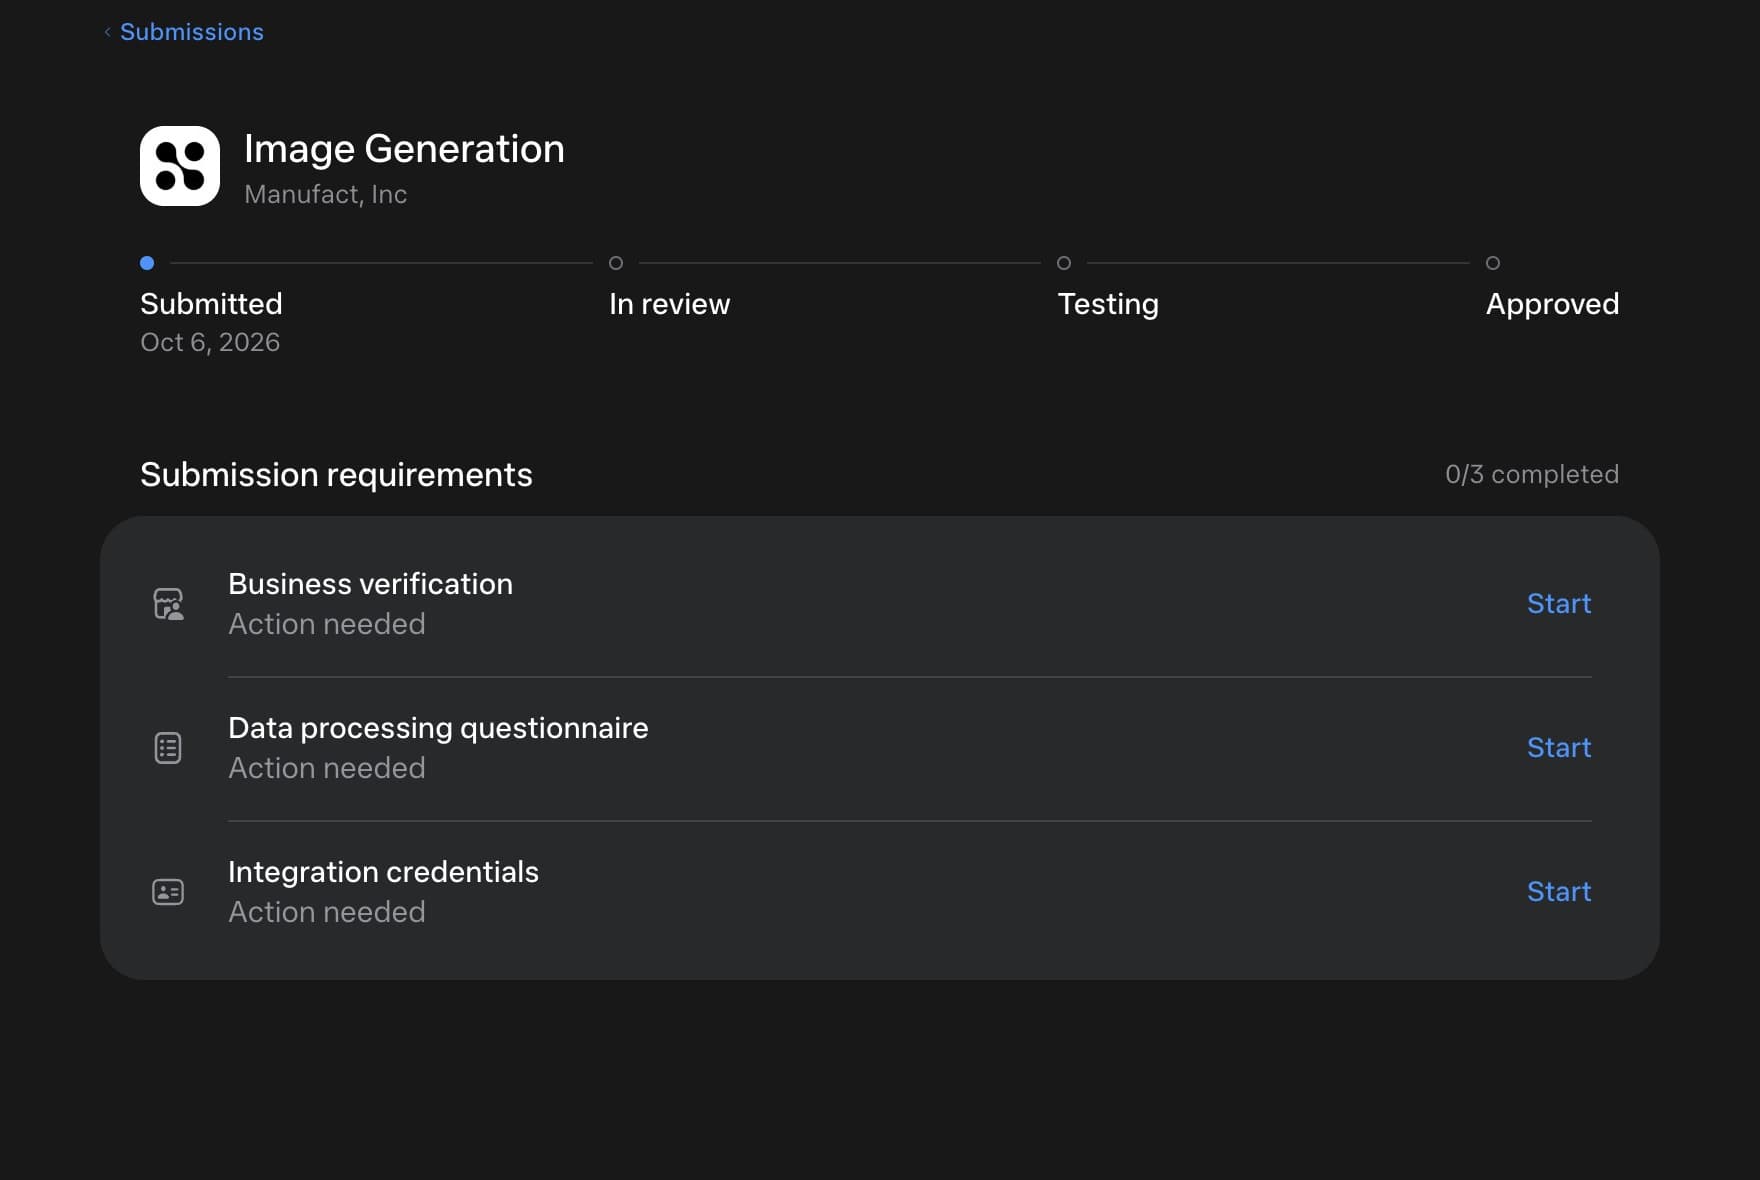
Open your submission in the Muse Connector Platform. The dashboard lists Business verification, Data processing questionnaire, and Integration credentials. Each has its own status, separate from the listing's review progress. The Image Generation submission below shows Submitted and 0/3 completed. Open each Start link to complete the intake. The Muse connector guidelines describe what reviewers need for each part.
Business verification
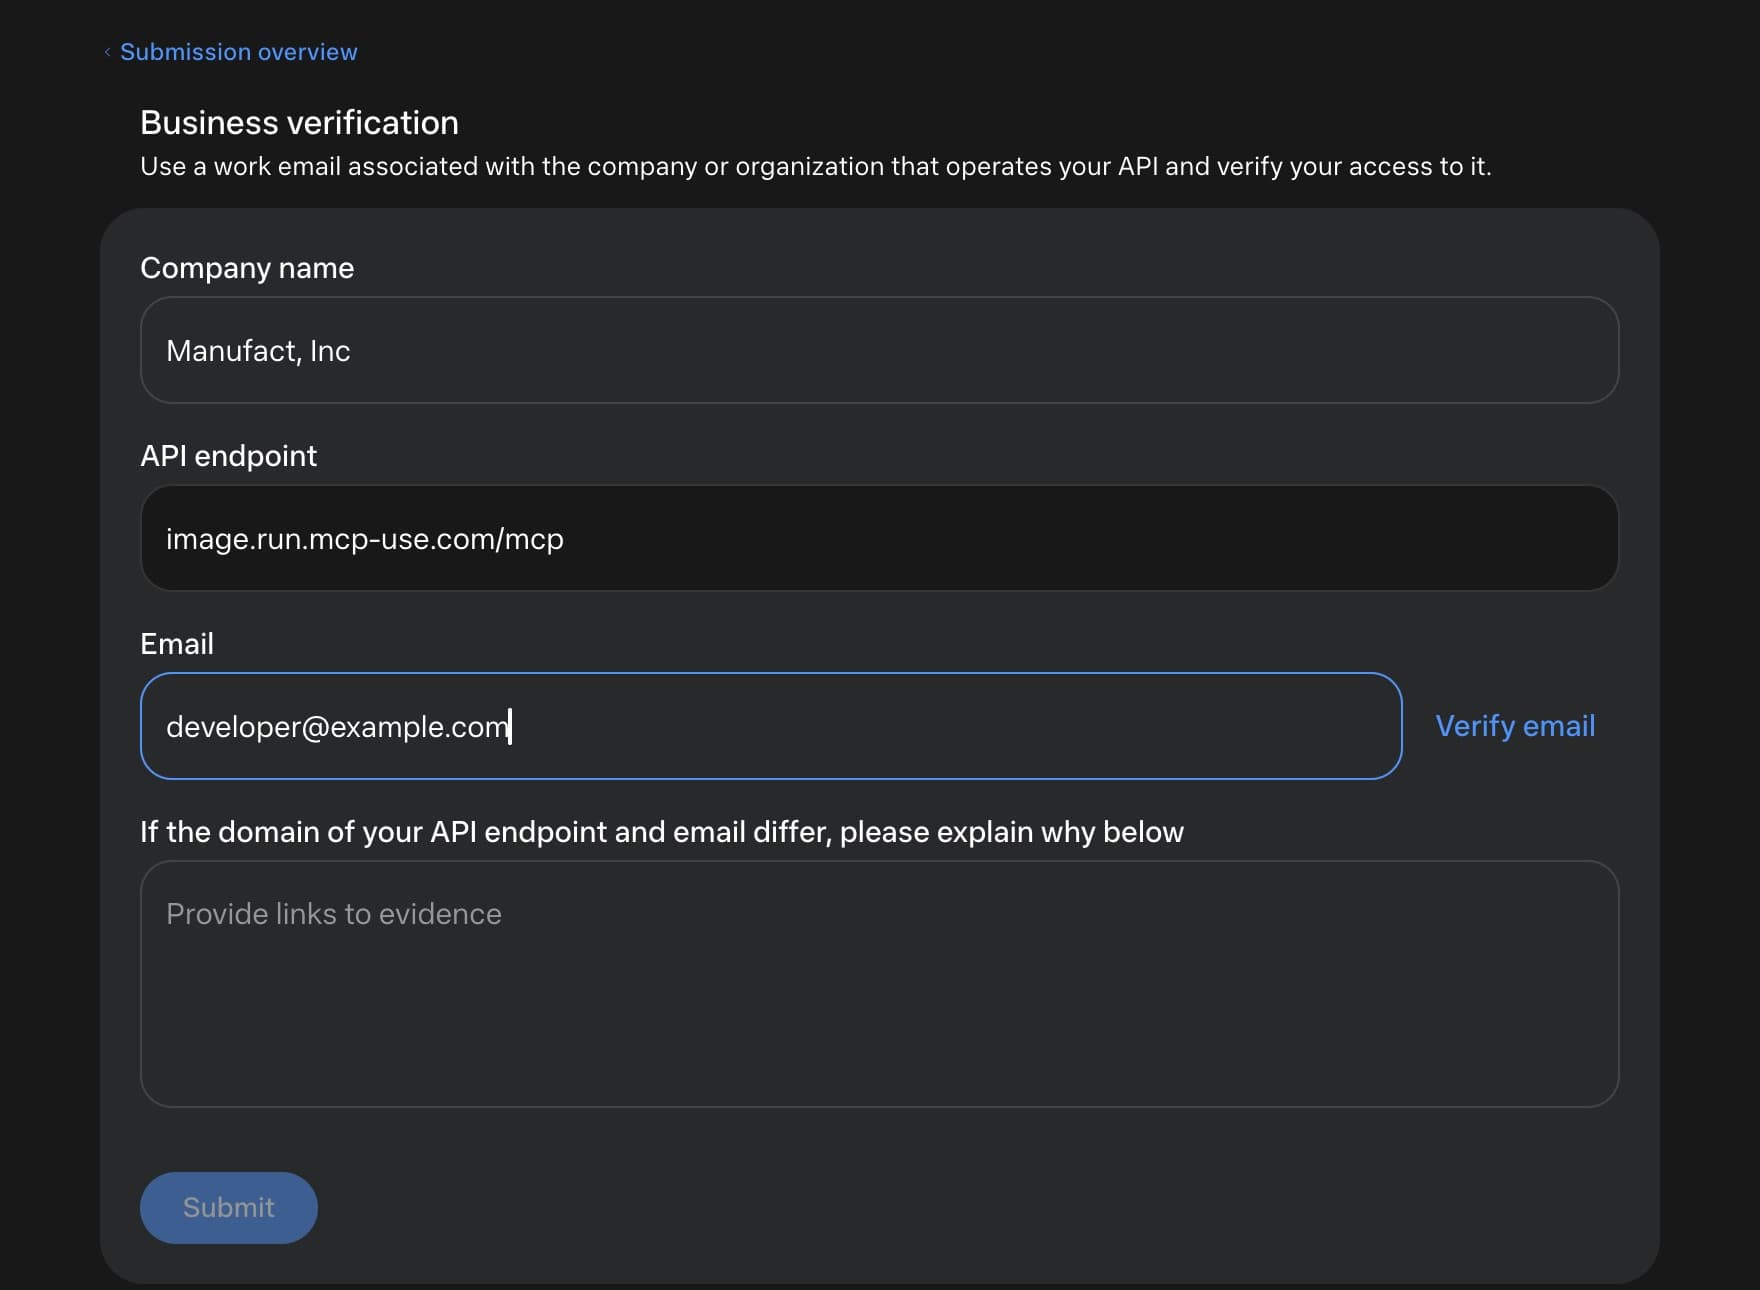
Check the company name and API endpoint, then enter a work email associated with the organization that operates the server. Click Verify email. If the endpoint and email use different domains, explain the relationship and provide links to evidence. Complete verification before submitting this section. The email shown below is a placeholder used only for the screenshot.
Data processing questionnaire
Muse calls this form a Transfer impact assessment. Enter the legal business name and choose a business type to reveal the remaining questions. Then specify where data is stored or accessed, where the business is based, and where the connector is offered.
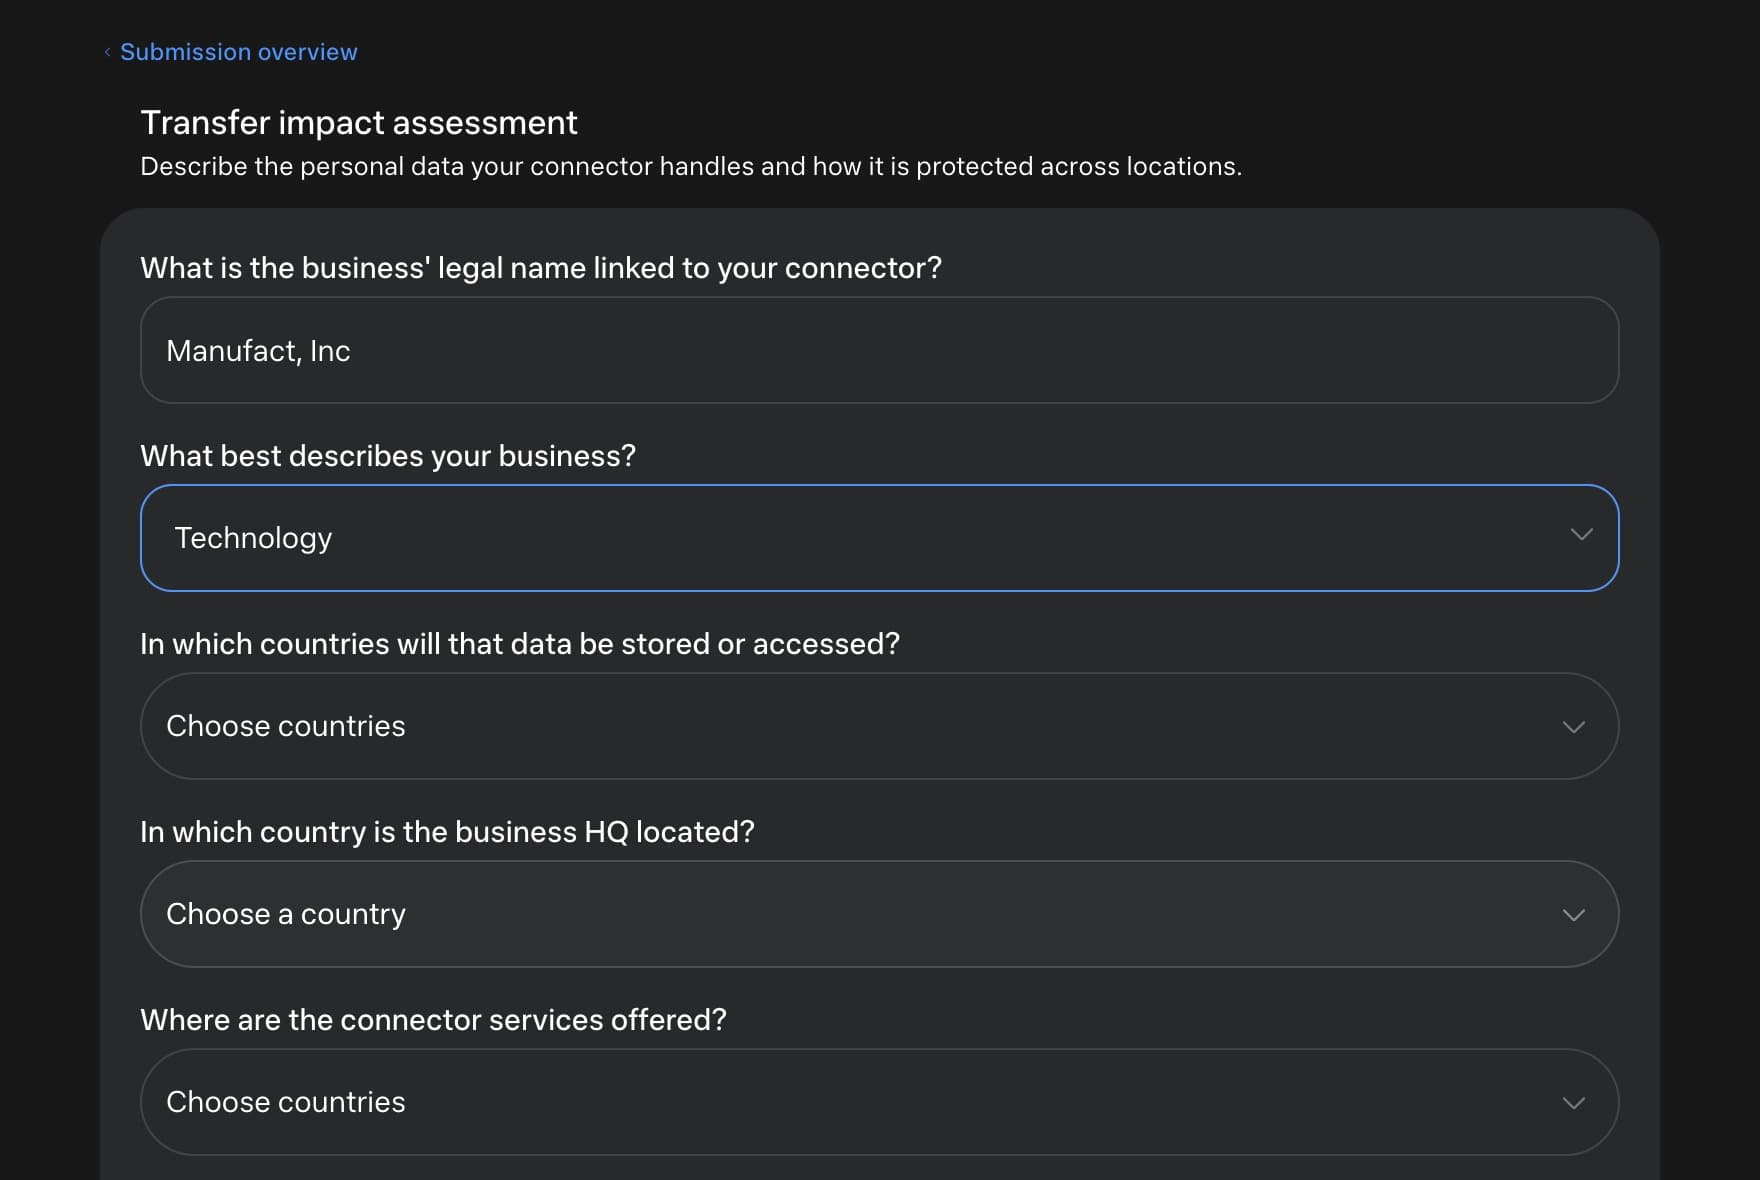
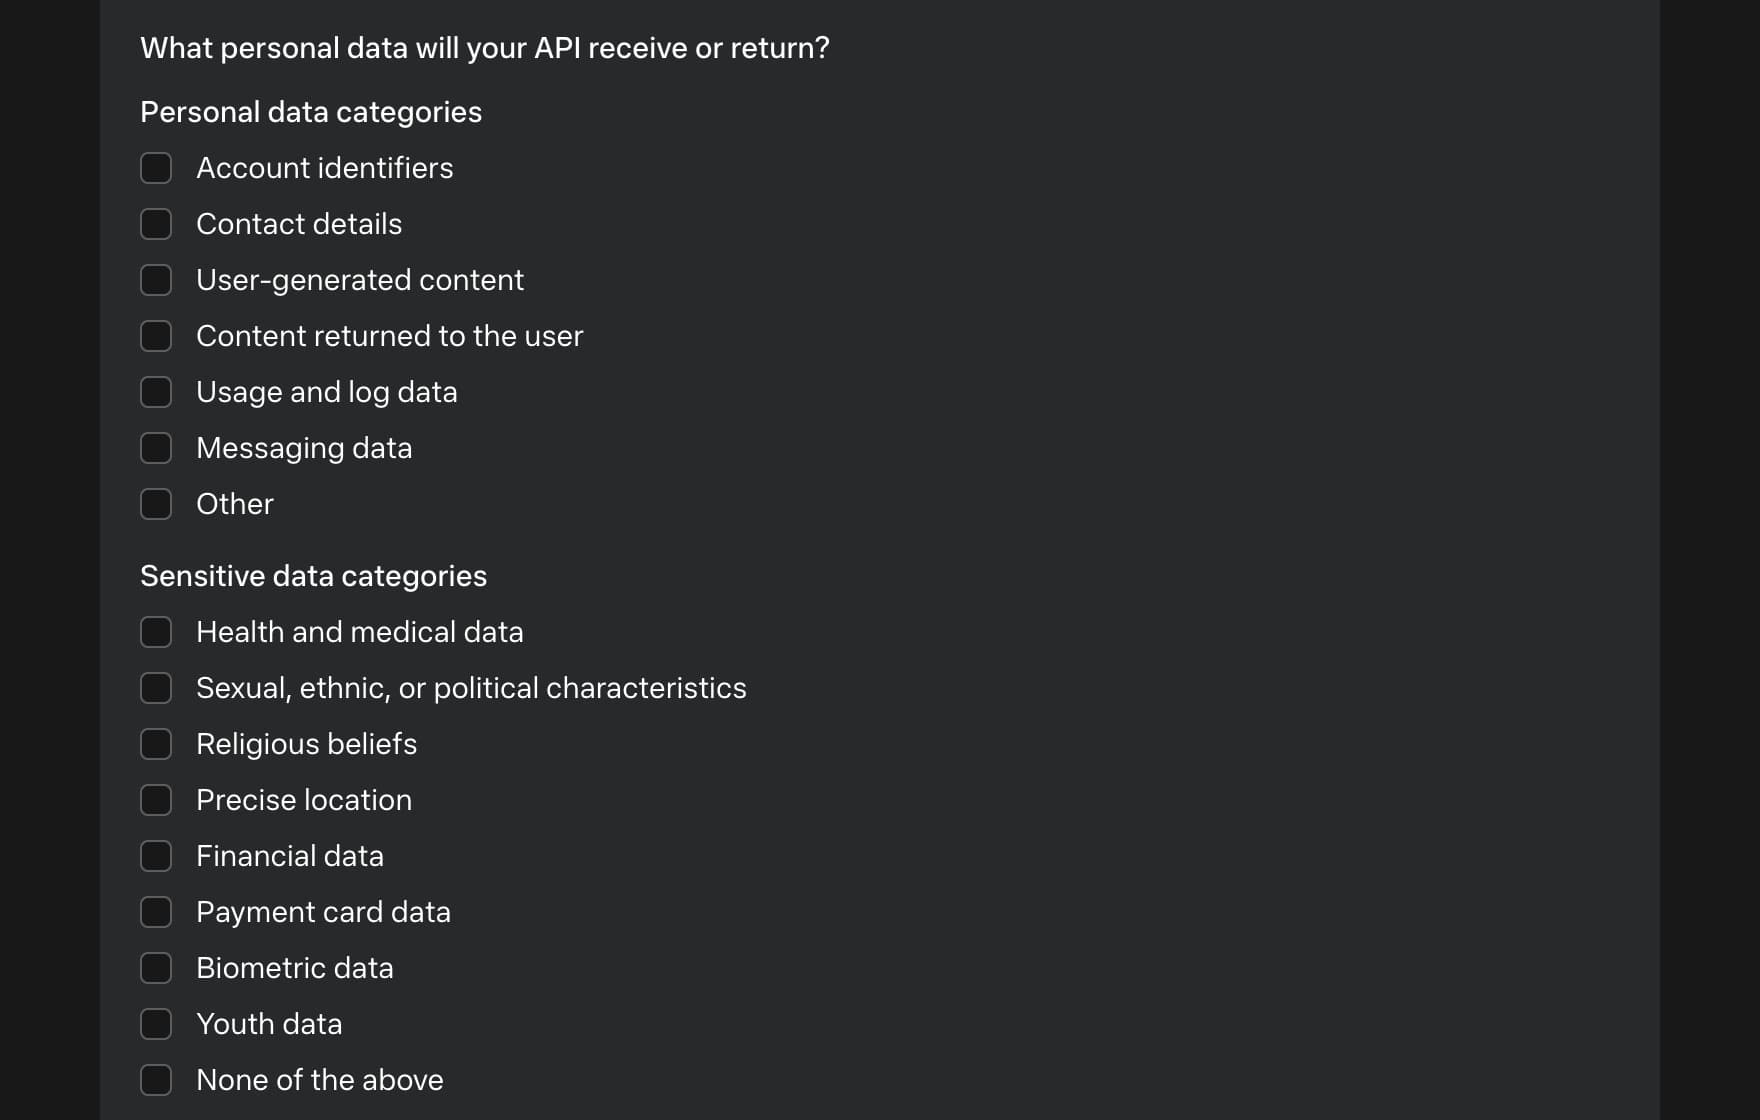
Select the personal and sensitive data categories that your API receives or returns. The blank boxes in this example are unanswered questions, not suggested selections.
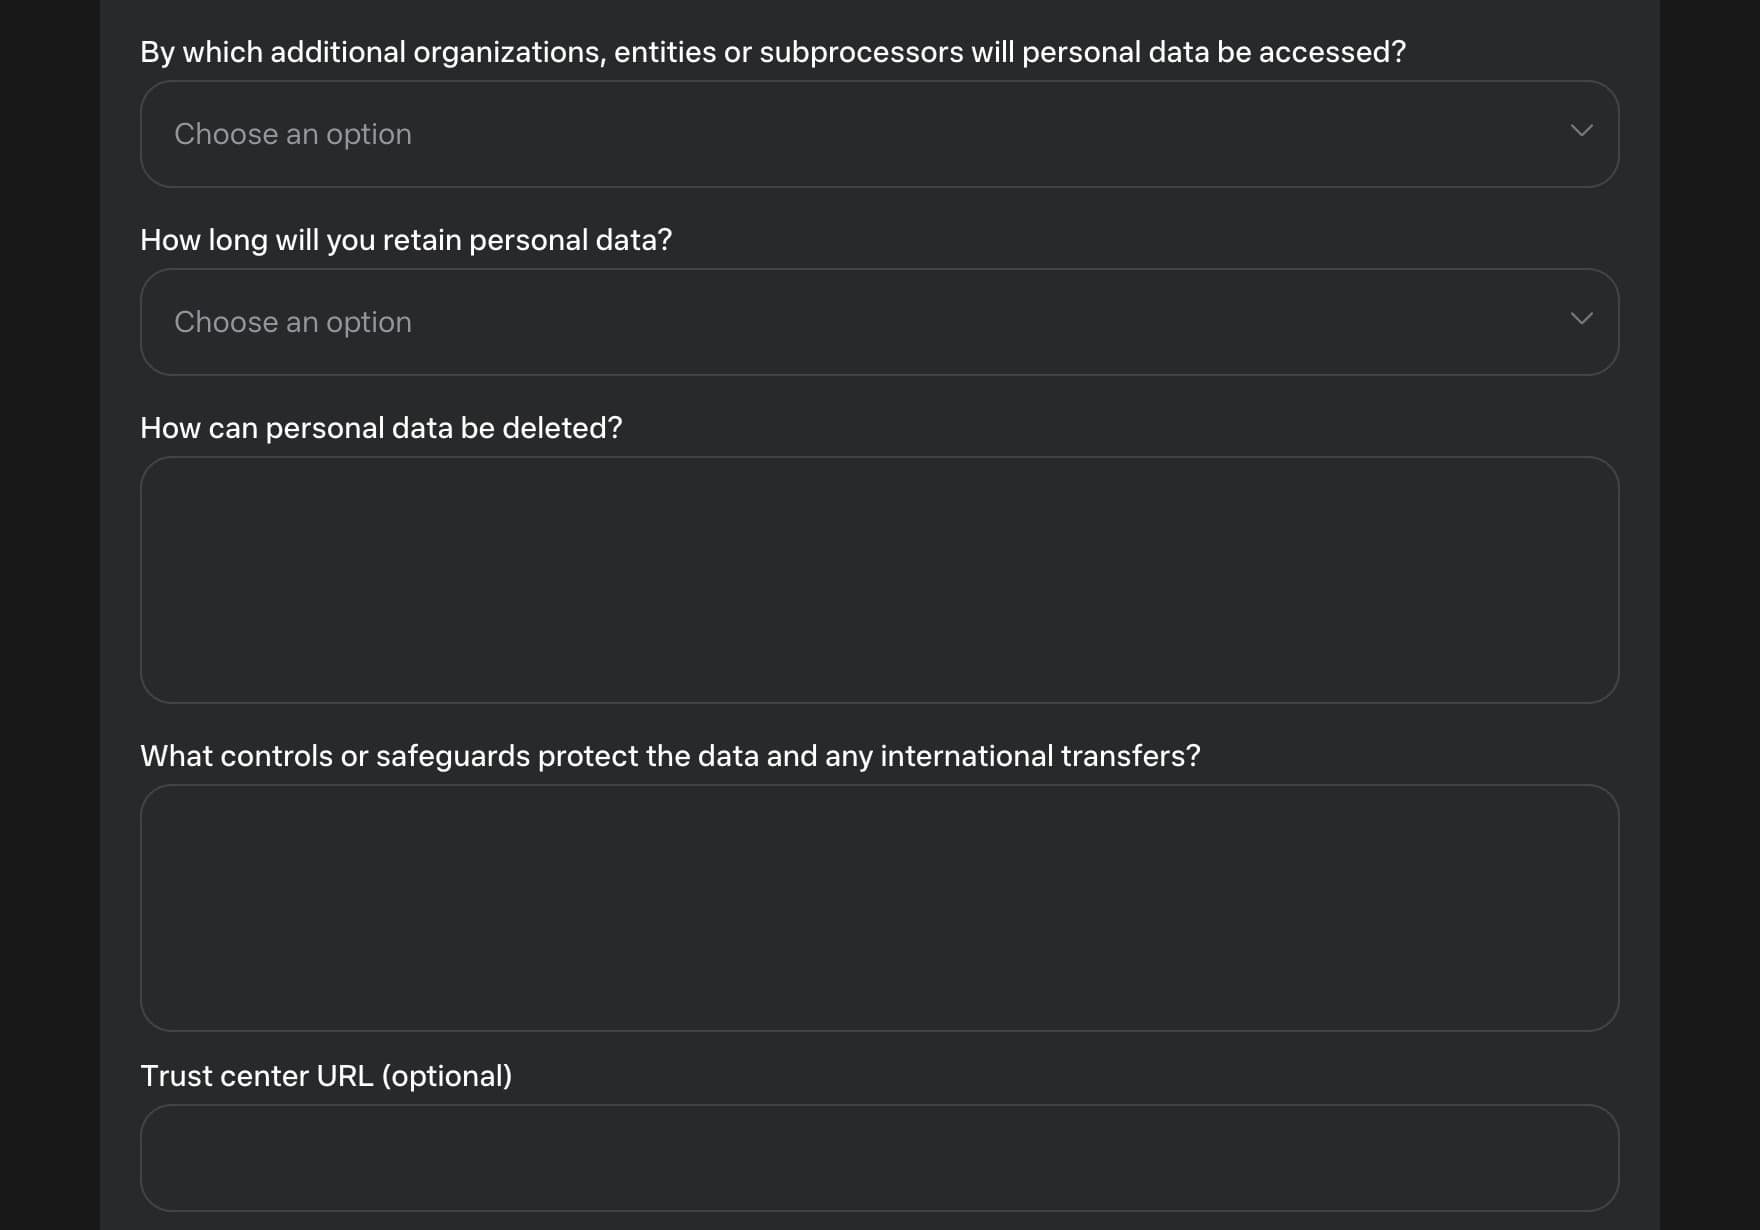
List the additional organizations or subprocessors that can access personal data. State how long you retain it, how people can delete it, and what protects it during storage and international transfers. The trust center URL is optional.
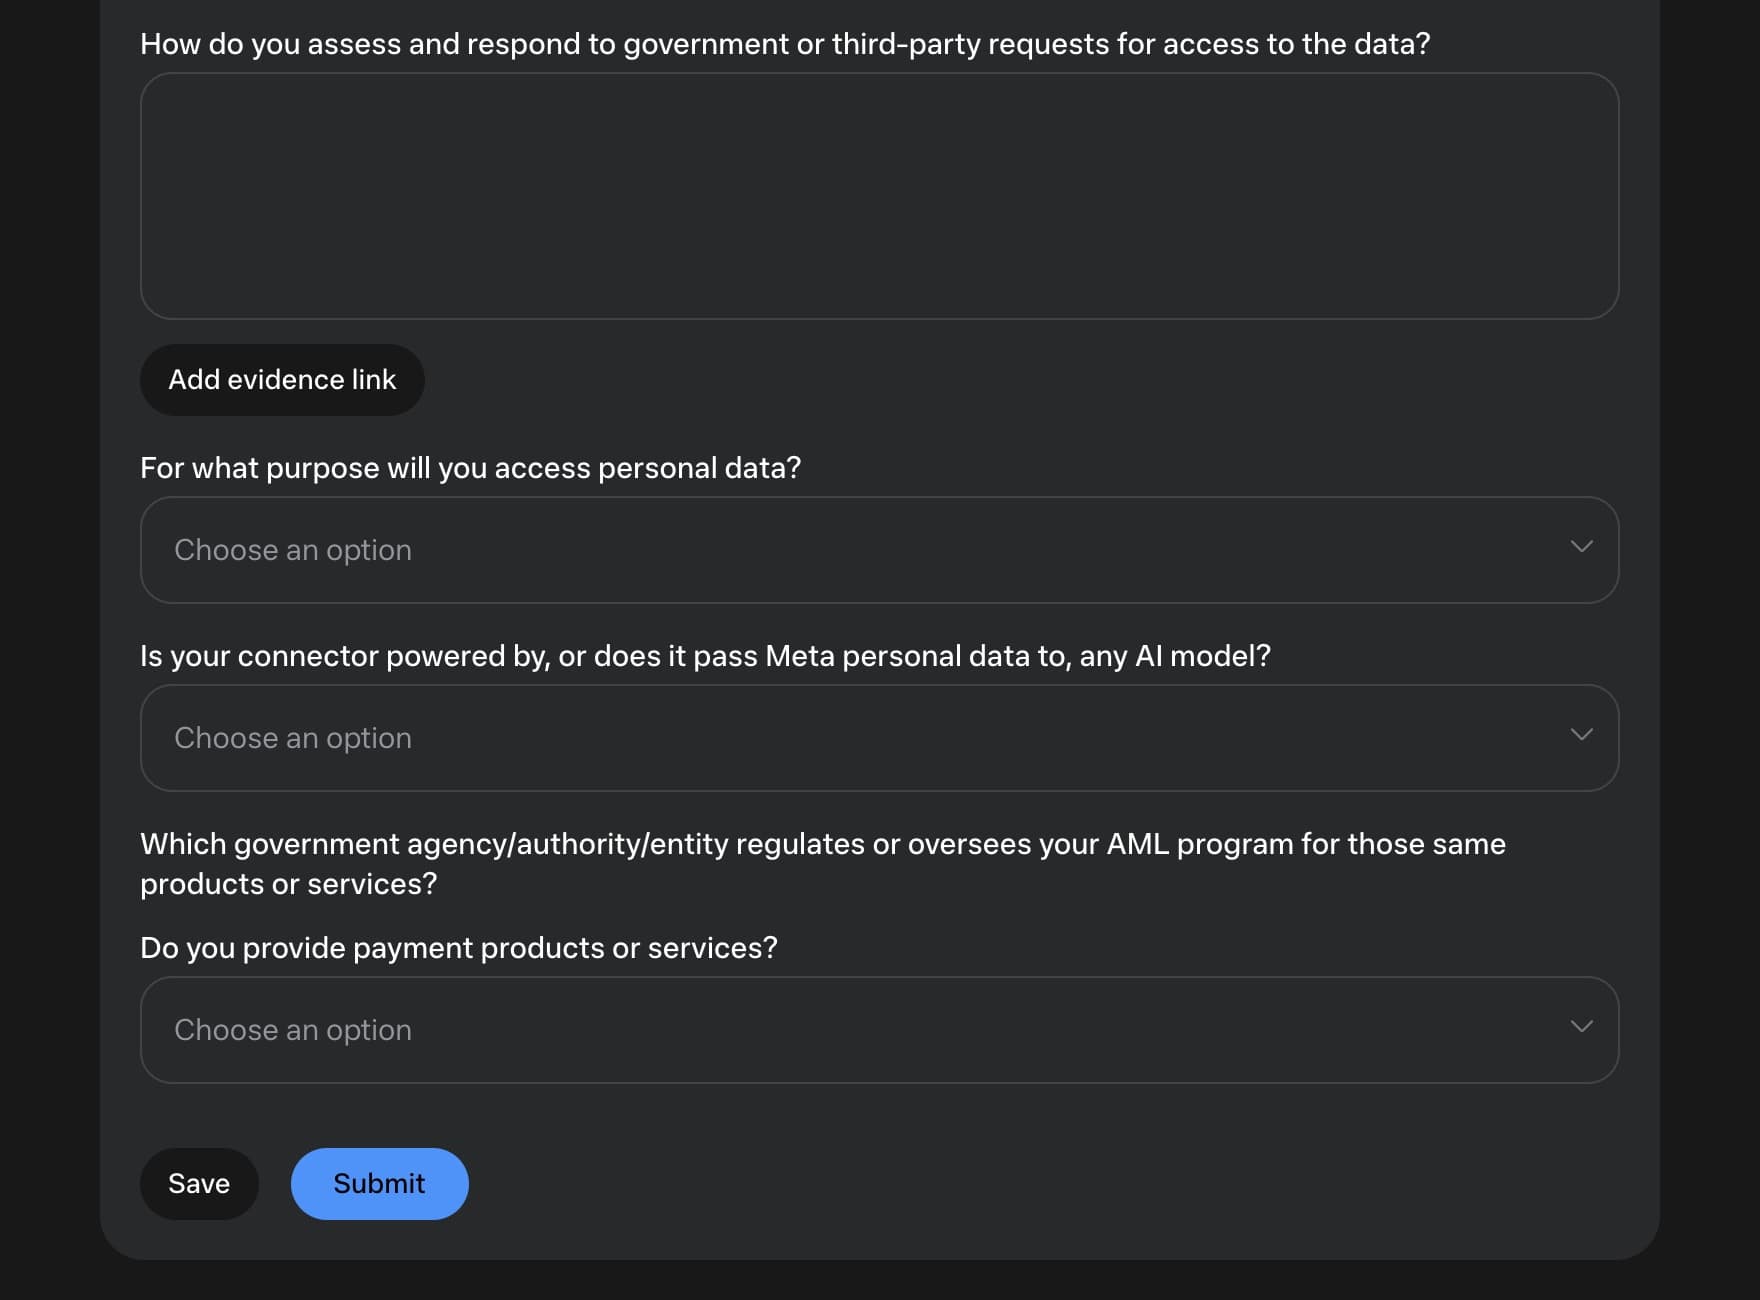
The final questions cover government or third-party access requests, evidence links, why you access the data, whether an AI model powers the connector or receives Meta personal data, and payment services. Use Save for a draft and Submit when your answers are complete.
Use your actual privacy policy and security documentation to answer these questions. A sample catalog server that only returns public product information will have different answers from an account-connected server that receives user identifiers or order data. Add evidence links where the form asks for them.
Integration credentials
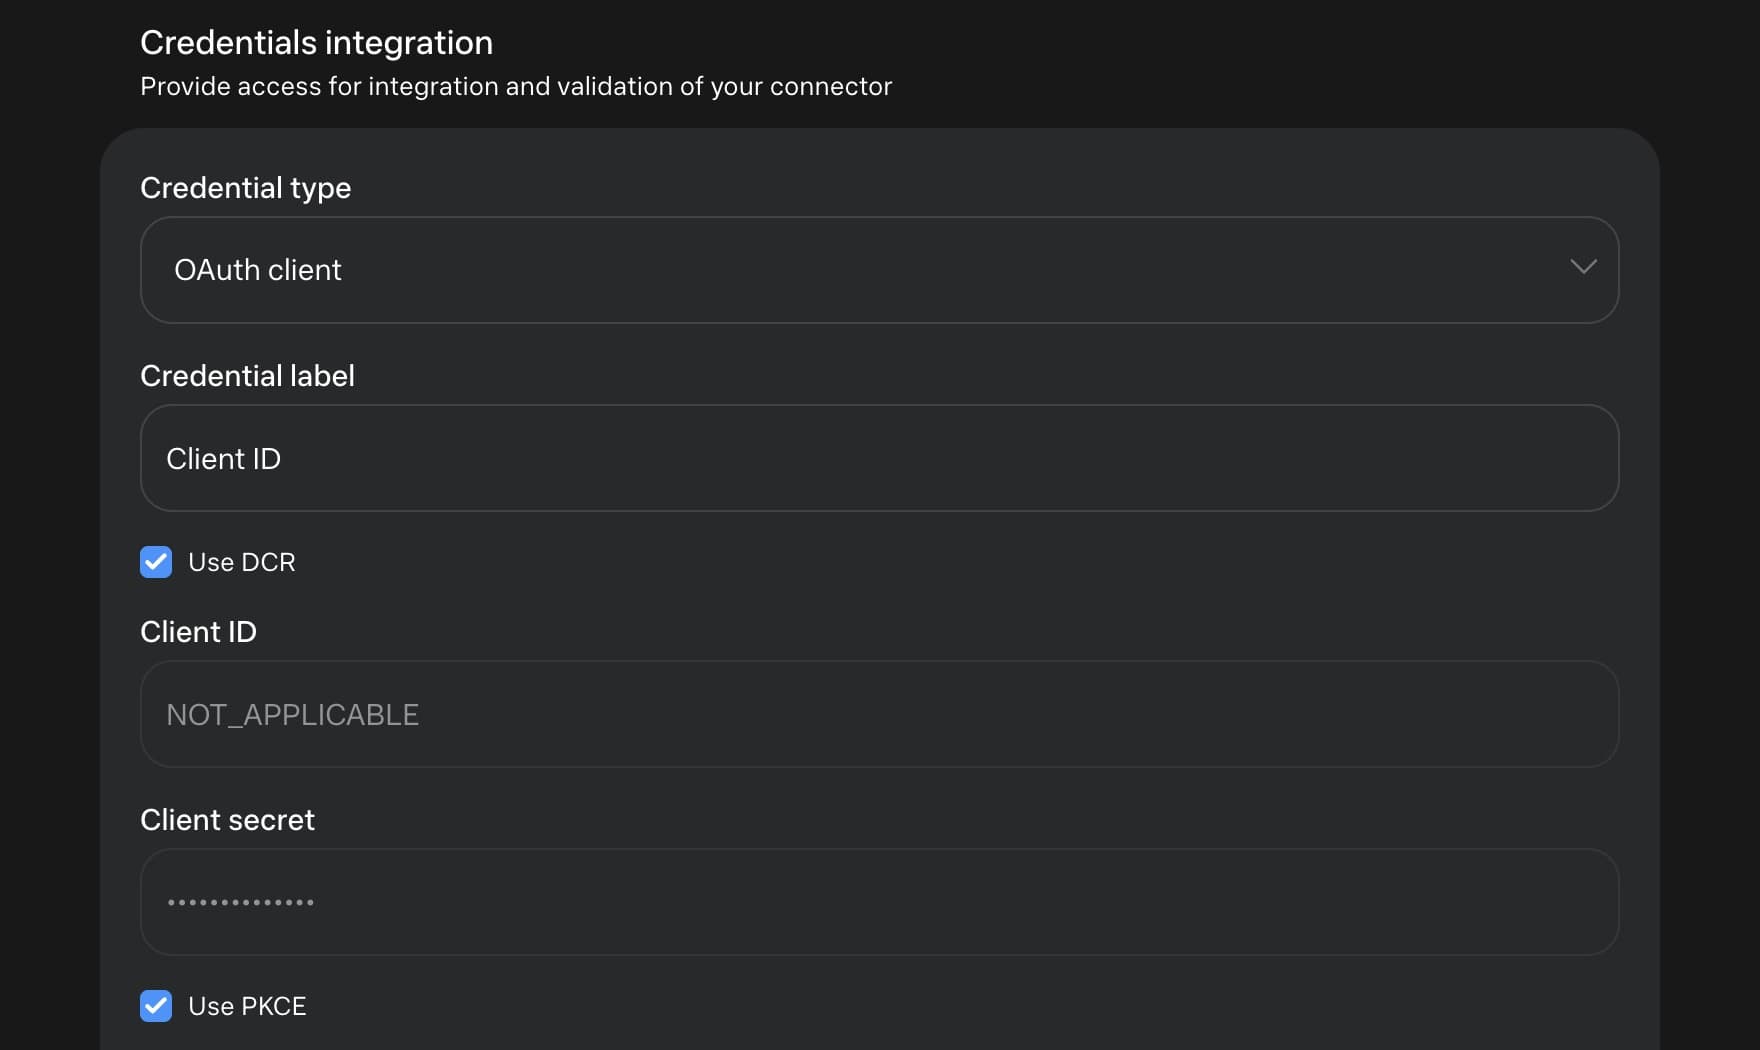
For Image Generation, Muse opens an OAuth client form with Use PKCE selected. Choose the credential type that matches your server. If it supports Dynamic Client Registration (DCR), select Use DCR; otherwise, enter the client ID and any required secret. The first screenshot shows DCR selected to expose that path. It was not saved.
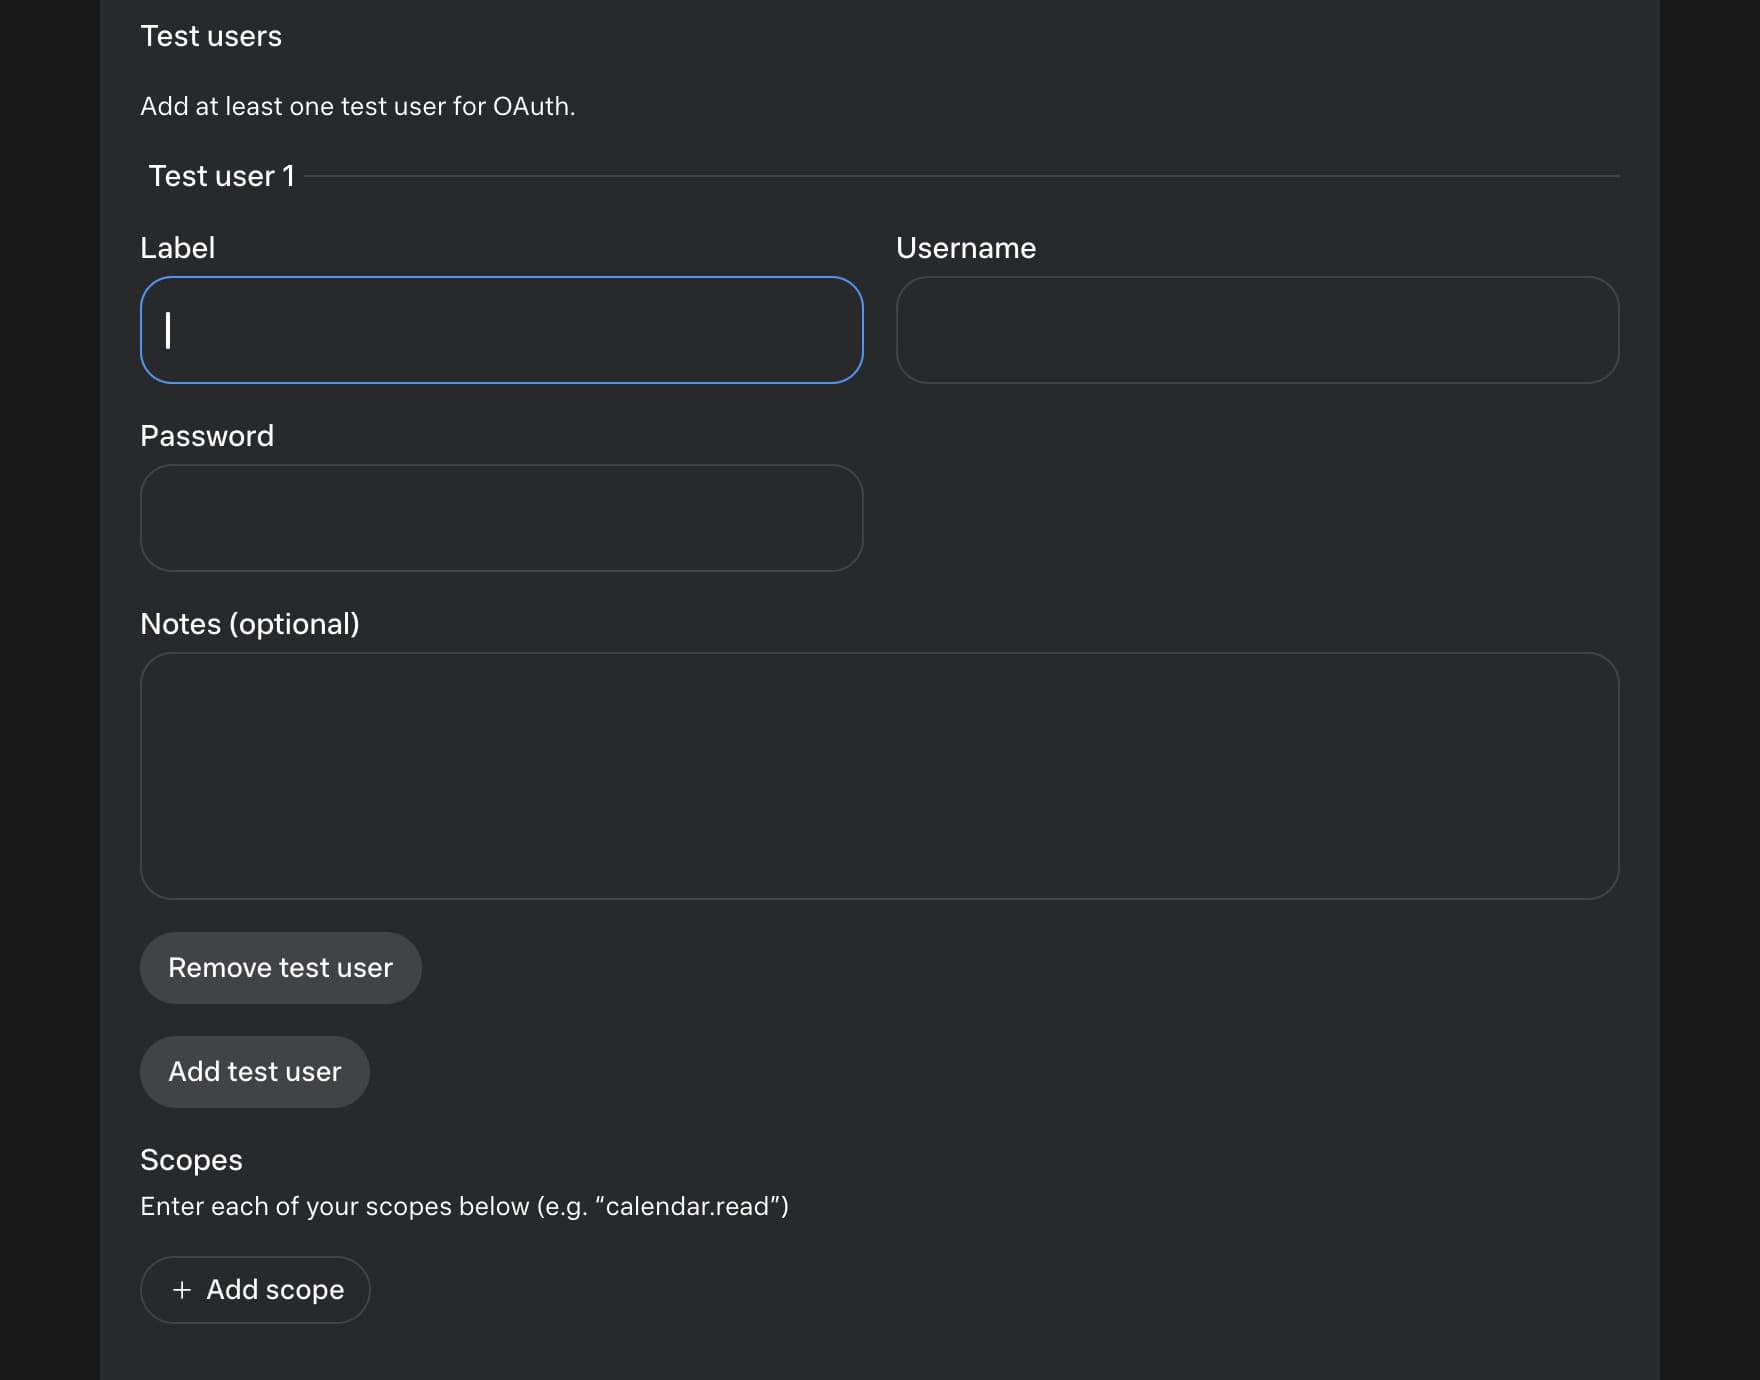
Click Add test user and provide a dedicated account that lets Muse reviewers exercise the submitted tools. Enter any required scopes and notes about account permissions, regional limits, or representative test data. The empty test user fields below show what Muse requests; no password was entered for the screenshot.
Enter credentials only in Muse's secure portal. Keep the test account available throughout review and avoid showing its password in screenshots or documentation. If a tool can place an order or make another consequential change, explain how reviewers can test it without a real charge or external side effect.
Where Save is available, use it to preserve a draft. Use Submit when the section is complete. A saved draft can still show In progress and does not complete the requirement.
What happens after submission?
After completing the intake, check the portal for review status. Muse performs a risk assessment, tool review, and end-to-end QA. Reviewers check permissions, results, and failure handling. Approval and featured placement are separate decisions. The connector guidelines also explain how to classify each tool as read or write and flag sensitive writes.
For other directories, see our guides to submitting an MCP app to ChatGPT and submitting an MCP server to Anthropic's directory.
For a comparison of distribution paths, including Grok custom connectors and the Cursor Marketplace, see how to distribute an MCP server across AI platforms.
Prepare your MCP server for submission
We can help test your endpoint and review your connector's listing details before you submit.